Nowadays everything has started moving into Cloud from complex applications to data storage. Cloud Computing seems to be the favorite of corporate world as well as individuals. Google Docs is one tool that has made life easy for many of us. You are freed from software installation, buying license and can access it anywhere from the world just via browser.
Maintaining, integrating data and tracking progress play an important role in any field. Though there might be many specialized tools to do it, Spreadsheet is one of the simplest yet effective tool available to us.Previously sharing spreadsheet with your colleague would involve sending out an email to them in which they will update and send you back or placing it in a shared location is another approach. But with online service like Google Docs things have become far more easier and seamless. You can instantly create, share and access documents.
Consider a situation: You need to share some spreadsheet to your colleagues. You want the document to be accessible to everyone of them but you wish to apply restriction to some parts of the sheet which might contain sensitive data so that they are not editable. A typical example would be when you are a teacher who had shared the assignment sheet to all your class students but want to avoid any mischievous ones from modifying and postponing your deadline date column! So how would you do it? Lets see how to prevent others from editing range of cells or specific part of a shared Google Spreadsheet. Below are the step by step instructions to achieve it.
Protect Range of Cells from being Modified in Google Spreadsheet
1. This is achieved through a feature called Protected ranges. First go to the concerned sheet.
2. Select File-> Share. Add all people with whom you want to share the document, select can edit from the drop down and click on share & save.
3. Now select range of cells or columns which you want to protect from being edited.
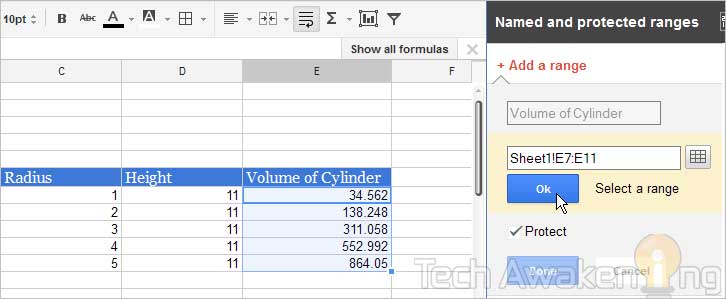
4. From menu select Data-> Named and protected ranges.
5. Give a name then check the protect option and click save.
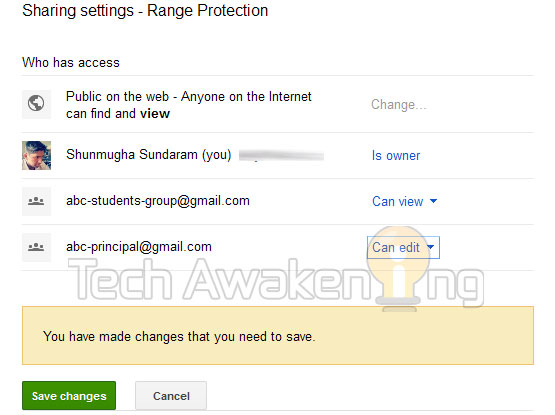
6. In the pop up which comes up you can configure the access levels. In our sample case only Principal should be allowed to edit not the students. So select can edit for Principal and can view for students. Finally click save changes. You are done now!
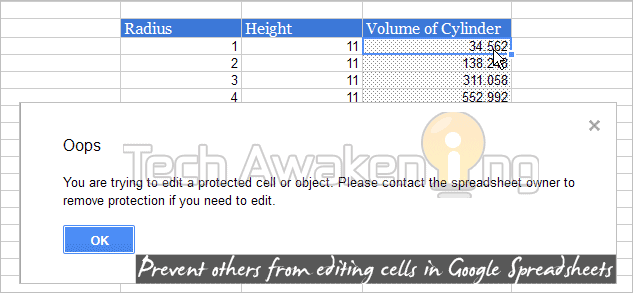
Note: When someone tries to modify a protected range of cells they would get a Oops error message as shown in first screen-cap.
Now on take control of your Google spreadsheet, protect just required parts of the sheet instead of protecting the entire sheet altogether. So, were you able to follow the above instructions? Did it work out for you and found it useful? Do share your thoughts with us!


Hi Shunmugha,
Delighta.com has a very simple and elegant solution to this problem which allows you to track anything in a Google spreadsheet. Any text message sent from a registered cell phone (linked to your account) to the Delighta phone number will be added to the spreadsheet. You can register as many cell phones as you want. Since each text message results in a new row in the spreadsheet, nothing gets overwritten.
Disclaimer: I am a co-founder of the company.
Suyog Bhobe,
Just had an overview of the service, looks promising. Hope the users find it useful 🙂
This does not work all the time. Google Sheet protects some cells, and not others, and is not consistent.
how to prevent users from copying shared documents in google drive?
Usually if you have the link, you can make a copy of it that’s how it is for now.